之前突然萌发自己搞个站点的想法,于是说干就干。一开始选了Hugo+Dream,无奈还不是很完善,很多功能自己加,包括加载性能等,都没有优化,眼馋Butterfly就换过来了。
本篇记录自己摸索美化本站Butterfly的过程。
本人也是外行,纯属自己折腾着玩,欢迎评论区交流,但不一定100%能帮到你 以下内容可能涉及修改主题源码,注意备份 胆大心细,出错多Google,百度真不顶啥用,半天搜不到一个有用的。什么夸克之类的,更拉跨 以下所有内容针对 Hexo 5.4.0,Butterfly 3.7.8 版本 及更高版本,其他主题或版本,请自行验证 页面美化 开始之前 如主题作者 Jerry 所说,最好在Hexo的根目录创建一个文件_config.butterfly.yml,并把主题目录的_config.yml内容复制到_config.butterfly.yml里,以后只需要在_config.butterfly.yml进行配置。
Hexo会自动合并主题中的_config.yml和_config.butterfly.yml里的配置,如果存在同名配置,会使用_config.butterfly.yml的配置,其优先度较高。
文章素材 建议在blog/source/下创建诸如img/css/js等文件夹,存放文章或网站用的素材,分门别类后续也方便维护,这是个好习惯。
Hexo打包的时候,会自动把/source/下的文件,包含到网站静态文件中去。
引入自定义css “工欲善其事,必先利其器”。我们先做好自定义样式的引入准备。
在站点配置文件blog/_config.blog.yml中,搜索定位到inject,插入以下内容:
1
2
3
4
inject: head: - <link rel="stylesheet" href="/css/custom.css">
这样,后续所有样式的自定义,就可以在blog/source/css/custom.css文件中进行,能不动主题源码,就不要改源码,以免后续更新变得复杂。
小贴士: custom.css及下文的color.css文件不生效问题,可以将这两个文件命名为custom@1.0.0.css和color@1.0.0.css。此后,凡是修改了这两个文件,都手动提升一个版本号,记得/_config.blog.yml中同步修改,即可规避上述问题。(同样需要刷新CDN)
文章页H1~H6样式修改 fontawesome图标 图标Unicode值获取
Butterfly在H1~H6样式上使用了 fontawesome.com 上的图标,引用的是Unicode形式。可自行查找合适的。
本站小风车样式 代码实现流程 本站小风车样式 让小风车转起来 风车转动速度 风车转的方向
本站小风车样式
本站使用了风车样式
1
2
3
4
5
6
beautify: enable: true field: post title-prefix-icon: '\f863' title-prefix-icon-color: '#F47466'
让小风车转起来
在上文的blog/source/css/custom.css文件中,加入以下代码即可。
1 2 3 4 5 6 7 8 9 10 11 12 13 14 15 16 17 18 19 20 21 22 23 24 25 h1 ::before , h2 ::before , h3 ::before , h4 ::before , h5 ::before , h6 ::before { -webkit-animation : ccc 1.6s linear infinite ; animation : ccc 1.6s linear infinite ; } @-webkit-keyframes ccc { 0% { -webkit-transform : rotate (0deg ); transform : rotate (0deg ) } to { -webkit-transform : rotate (-1turn ); transform : rotate (-1turn ) } } @keyframes ccc { 0% { -webkit-transform : rotate (0deg ); transform : rotate (0deg ) } to { -webkit-transform : rotate (-1turn ); transform : rotate (-1turn ) } }
风车转动速度
想调整风车转动速度,修改以下内容里的时间,数字越小转动越快。
1
2
3
4
h1 ::before , h2 ::before , h3 ::before , h4 ::before , h5 ::before , h6 ::before { -webkit-animation : ccc 1.6s linear infinite ; animation : ccc 1.6s linear infinite ; }
风车转的方向 -1turn为逆时针转动,1turn为顺时针转动,相同数字部分记得统一修改:
1
2
3
4
5
6
7
8
9
10
11
12
13
14
15
16
17
18
19
20
@-webkit-keyframes ccc { 0% { -webkit-transform : rotate (0deg ); transform : rotate (0deg ) } to { -webkit-transform : rotate (-1turn ); transform : rotate (-1turn ) } } @keyframes ccc { 0% { -webkit-transform : rotate (0deg ); transform : rotate (0deg ) } to { -webkit-transform : rotate (-1turn ); transform : rotate (-1turn ) } }
小风车颜色、大小修改 又耗费了大半下午,给H1~H6标题前,不同大小的风车设置不同颜色,看起来舒服多了。
效果演示 效果预览 代码实现流程 小风车颜色css代码 小风车hover效果 页面设置图标转速
直接上代码:
1
2
3
4
5
6
7
8
9
10
11
12
13
14
15
16
17
18
19
20
21
22
23
24
25
26
27
28
29
30
31
32
33
34
35
36
#content-inner .layout h1 ::before { color : #ef50a8 ; margin-left : -1.55rem ; font-size : 1.3rem ; margin-top : -0.23rem ; } #content-inner .layout h2 ::before { color : #fb7061 ; margin-left : -1.35rem ; font-size : 1.1rem ; margin-top : -0.12rem ; } #content-inner .layout h3 ::before { color : #ffbf00 ; margin-left : -1.22rem ; font-size : 0.95rem ; margin-top : -0.09rem ; } #content-inner .layout h4 ::before { color : #a9e000 ; margin-left : -1.05rem ; font-size : 0.8rem ; margin-top : -0.09rem ; } #content-inner .layout h5 ::before { color : #57c850 ; margin-left : -0.9rem ; font-size : 0.7rem ; margin-top : 0.0rem ; } #content-inner .layout h6 ::before { color : #5ec1e0 ; margin-left : -0.9rem ; font-size : 0.66rem ; margin-top : 0.0rem ; }
鼠标碰到小风车转速变慢及变色
设置鼠标碰到标题时,小风车跟随标题变色,且像是被光标阻碍了,转速变慢。鼠标离开恢复转速。也可以设置为none鼠标碰到停止转动。
1
2
3
4
5
6
7
8
#content-inner .layout h1 :hover , #content-inner .layout h2 :hover , #content-inner .layout h3 :hover , #content-inner .layout h4 :hover , #content-inner .layout h5 :hover , #content-inner .layout h6 :hover { color : #49b1f5 ; } #content-inner .layout h1 :hover ::before , #content-inner .layout h2 :hover ::before , #content-inner .layout h3 :hover ::before , #content-inner .layout h4 :hover ::before , #content-inner .layout h5 :hover ::before , #content-inner .layout h6 :hover ::before { color : #49b1f5 ; -webkit-animation : ccc 3.2s linear infinite ; animation : ccc 3.2s linear infinite ; }
页面设置图标转速
突然发现原作者设置的右下角设置icon转的太快了,让它慢一点吧。继续添加:
1 2 3 4 #rightside_config i .fas .fa-cog .fa-spin { animation : fa-spin 5s linear infinite ; }
文章置顶 想要在首页置顶某篇文章,只需在文章头部信息添加以下内容:
友链说明 主题作者的教程页面,可能由于网站更新等原因,代码缩进错误。直接复制到blog/source/_data/link.yml文件会报错。
效果预览 link.yml代码 直接复制我的吧:
1
2
3
4
5
6
7
8
9
10
11
12
13
14
15
16
17
18
19
20
21
22
23
24
25
26
27
28
29
30
31
32
33
34
35
36
37
38
39
40
41
42
43
44
45
46
47
48
49
50
51
52
53
54
55
56
57
58
59
60
61
62
63
64
65
66
67
68
69
70
71
72
73
74
75
76
77
78
79
80
81
82
83
84
85
86
87
- class_name: 我的网站 🎉🎉 class_desc: 成年人当然全都要。 link_list: - name: guole's Blog link: https://guole.fun/ avatar: https://cdn.guole.fun/logo/guole.fun.png descr: 本站 Hexo 版 - name: guole's Blog link: https://blog.guole.fun/ avatar: https://cdn.guole.fun/logo/blog.guole.fun.png descr: 本站 Hugo 版 - name: 音乐小站 link: https://music.guole.fun/ avatar: https://cdn.guole.fun/logo/music.png descr: 一个小想法,造就了第一个小站 - class_name: 友情链接 👋👋 class_desc: 天下快意之事莫若友,快友之事莫若谈。 link_list: - name: realyao link: https://realyao.me/ avatar: https://cdn.guole.fun/logo/realyao.png descr: 其个人 Blog 吸引我接触前端 - name: g1eny0ung link: https://g1eny0ung.site/ avatar: https://cdn.guole.fun/logo/g1eny0ung.jpg descr: 本站 Hugo 版主题作者 - name: MYW link: https://immyw.com/ avatar: https://immyw.com/img/avatar.png descr: 当前看到的本站主题作者 - name: iMaeGoo link: https://www.imaegoo.com/ avatar: https://cdn.guole.fun/logo/虹墨.jpg descr: Twikoo 功能作者 - name: 黑石博客 link: https://www.heson10.com/ avatar: https://cdn.guole.fun/logo/黑石.png descr: BBtalk 功能作者 - name: 木木木木木 link: https://immmmm.com/ avatar: https://cdn.guole.fun/logo/木木木.jpg descr: Bber 功能作者 - name: 小康博客 link: https://www.antmoe.com/ avatar: https://cdn.jsdelivr.net/gh/sviptzk/HexoStaticFile@latest/avatar.jpg descr: 一个收藏回忆与分享技术的地方! - class_name: 现实中的好PY 🤝🤝 class_desc: link_list: - name: Sakura link: https://www.hanz.vip/ avatar: https://cdn.guole.fun/logo/sakura.jpg descr: 朋友,PHP 开发,唱歌贼好听 - name: 大西瓜 link: http://bikabi.cn/ avatar: https://cdn.guole.fun/logo/大西瓜.png descr: 朋友,前端开发,羽毛球贼厉害 - class_name: 推荐网站 ✌✌ class_desc: 值得推荐的网站 link_list: - name: Hexo link: https://hexo.io/zh-cn/ avatar: https://d33wubrfki0l68.cloudfront.net/6657ba50e702d84afb32fe846bed54fba1a77add/827ae/logo.svg descr: 快速、简单且强大的网页框架 - name: Hugo link: https://gohugo.io/ avatar: https://cdn.guole.fun/logo/hugo.png descr: Go 语言的静态网站生成器 - name: Butterfly link: https://butterfly.js.org/ avatar: https://cdn.jsdelivr.net/gh/jerryc127/CDN/img/butterfly-github-avatar.png descr: 本站主题,真好看 - name: Lovelt link: https://gohugo.io/ avatar: https://cdn.guole.fun/logo/lovelt.png descr: Hugo主题,曾借鉴过一些样式,感谢 - name: 阿里图标库 link: https://www.iconfont.cn/ avatar: https://cdn.guole.fun/logo/weizhi.png descr: 多次使用,感谢 - name: 8K壁纸库 link: https://wallhaven.cc/ avatar: https://cdn.guole.fun/logo/weizhi.png descr: 本站背景从这里来,感谢
当然,欢迎添加本站友链:
1
2
3
4
- name: guole's Blog link: https://guole.fun/ avatar: https://guole.fun/img/gl.jpg descr: 保持理智,相信明天。
自定义样式适配暗色模式 有时候自己改了些东西,但暗色模式下,未生效,这个时候咋整。很简单,配置一份颜色代码,放在blog/source/css/color.css文件中,增加以下内容(记得去blog/_config.butterfly.yml中,在inject里引用):
代码实现流程 1 2 3 4 5 6 7 8 9 10 [data-theme=light] { --card-bg : rgba (255 ,255 ,255 ,.9 ) !important ; } [data-theme=dark] { --card-bg : rgba (26 , 27 , 29 , .9 ) !important ; --btn-bg : #012c48 !important ; }
比如,--card-bg:可以使用RGBa格式,设置页面背景的透明度。这里不能直接写css代码,可以先在color.css中定义颜色,然后在custom.css中设置应用这个值。
简单演示 例:修改网站背景色
color文件 custom文件
1 2 3 4 5 6 7 [data-theme=light] { --card-bg : rgba (255 ,255 ,255 ,.9 ) !important ; } [data-theme=dark] { --card-bg : rgba (26 , 27 , 29 , .9 ) !important ; }
1 2 3 #web_bg { background : var (--card-bg) !important ; }
文章页局部html代码不渲染 md文章页,部分内容不想经过 Hexo 渲染,则包一层raw标签:
1 2 3 4 {% raw %} <div class ="" > </div > <script > </script > {% endraw %}
自定义页面添加分享按钮 方法一:修改源代码一绝后患 第一步:修改源代码 第二步:其他页面样式微调 附赠:各页面独立配置
自己创建的独立页面
在butterfly\themes\butterfly\layout\includes\page\default-page.pug文件中,增加以下内容,注意缩进:
1 2 3 4 5 6 7 #article-container if top_img === false h1.page-title= page.title != page.content + .tag_share + if theme.addThis.enable || theme.sharejs.enable || theme.addtoany.enable && page.share !== false + include ./../third-party/share/index.pug
友链页面
在butterfly\themes\butterfly\layout\includes\page\flink.pug文件中,增加以下内容,注意缩进:
1 2 3 4 5 6 7 8 9 10 11 12 13 14 15 16 17 18 19 20 21 22 23 #article-container if top_img === false h1.page-title= page.title .flink if site.data.link each i in site.data.link if i.class_name h2!= i.class_name if i.class_desc .flink-desc!=i.class_desc .flink-list each item in i.link_list .flink-list-item a(href=url_for(item.link) title=item.name target="_blank") .flink-item-icon img(src=url_for(item.avatar) onerror=`this.onerror=null;this.src='` + url_for(theme.error_img.flink) + `'` alt=item.name ) .flink-item-name= item.name .flink-item-desc(title=item.descr)= item.descr != page.content + .tag_share + if theme.addThis.enable || theme.sharejs.enable || theme.addtoany.enable && page.share !== false + include ./../third-party/share/index.pug
在需要增加的页面,md文件尾部增加以下css样式:
1 2 3 4 5 <style> .social-share { font-size : 0.85em !important ; } </style>
可在文章头部信息中,增加share: false来禁用当前页面的点赞按钮
方法二:在md文件插入较繁琐 第一步:文章页尾部插入 第二步:其他页面样式微调
在需要的md文件页面,增加以下代码:
其中data-sites的值,是设置显示哪些分享按钮。可以填该js支持的值:qzone, qq, weibo, wechat, douban, linkedin, facebook, twitter, google
1 2 3 4 <div class ="share-component" data-sites ="facebook,twitter,weibo,wechat,qq,douban" data-wechat-qrcode-title ="微信分享" data-wechat-qrcode-helper ="<p>微信扫一扫,分享本篇给朋友</p>" > </div > <link rel ="stylesheet" href ="https://cdn.jsdelivr.net/npm/social-share.js/dist/css/share.min.css" media ="all" onload ="this.media='all'" > <script src ="https://cdn.jsdelivr.net/npm/social-share.js/dist/js/social-share.min.js" defer ="" > </script >
在需要增加的页面,md文件尾部增加以下css样式:
1 2 3 4 5 <style> .social-share { font-size : 0.85em !important ; } </style>
自定义页面添加赞赏 自己手动添加主题的打赏功能按钮。
方法一:修改源代码一绝后患 第一步:修改源代码 第二步:其他页面样式微调 附赠:各页面独立配置
自己创建的独立页面
在butterfly\themes\butterfly\layout\includes\page\default-page.pug文件中,增加以下内容,注意缩进:
1 2 3 4 5 6 7 8 9 #article-container if top_img === false h1.page-title= page.title != page.content .tag_share if theme.addThis.enable || theme.sharejs.enable || theme.addtoany.enable && page.share !== false include ./../third-party/share/index.pug + if theme.reward.enable && page.reward !== false + !=partial('includes/post/reward', {}, {cache: true})
友链页面
在butterfly\themes\butterfly\layout\includes\page\flink.pug文件中,增加以下内容,注意缩进:
1 2 3 4 5 6 7 8 9 10 11 12 13 14 15 16 17 18 19 20 21 22 23 24 25 #article-container if top_img === false h1.page-title= page.title .flink if site.data.link each i in site.data.link if i.class_name h2!= i.class_name if i.class_desc .flink-desc!=i.class_desc .flink-list each item in i.link_list .flink-list-item a(href=url_for(item.link) title=item.name target="_blank") .flink-item-icon img(src=url_for(item.avatar) onerror=`this.onerror=null;this.src='` + url_for(theme.error_img.flink) + `'` alt=item.name ) .flink-item-name= item.name .flink-item-desc(title=item.descr)= item.descr != page.content .tag_share if theme.addThis.enable || theme.sharejs.enable || theme.addtoany.enable && page.share !== false include ./../third-party/share/index.pug + if theme.reward.enable && page.reward !== false + !=partial('includes/post/reward', {}, {cache: true})
在需要增加的页面,md文件尾部增加以下css样式:
1 2 3 4 5 6 7 8 9 10 11 12 13 14 15 16 17 18 19 20 21 22 23 24 25 26 27 28 29 30 31 32 33 34 <style> .img-alt .is-center ::before {content : "" !important ;}#article-container ul > li :not (.tab )::before { top : unset !important ; width : unset !important ; height : unset !important ; border : unset !important ; border-radius : unset !important ; background : unset !important ; content : unset !important ; line-height : unset !important ; } .social-share { font-size : 0.85em !important ; } .reward-item { padding : 1rem .5rem 0 .5rem !important ; } .post-reward .reward-main .reward-all { display : inline-block; margin : 0 ; padding : 0 .5rem 1rem .5rem !important ; } .post-reward .post-qr-code-desc { margin-bottom : 0 !important ; } .post-qr-code-img .entered .loaded { display : unset !important ; margin : unset !important ; } .wechat-qrcode .help p { margin : unset !important ; } </style>
可在文章头部信息中,增加reward: false来禁用当前页面的点赞按钮
方法二:不修改源代码较繁琐 第一步:文章页尾部插入 第二步:其他页面样式微调
在需要点赞功能的页面md文件结尾加入以下内容:
1 2 3 4 5 6 7 8 9 10 11 12 13 14 15 16 <div class ="post-reward" > <div class ="reward-button button--animated" > <i class ="fas fa-qrcode" > </i > 打赏</div > <div class ="reward-main" > <ul class ="reward-all" > <li class ="reward-item" > <img class ="post-qr-code-img entered loaded" src ="/img/wechat.png" > </a > <div class ="post-qr-code-desc" > WeChat</div > </li > <li class ="reward-item" > <img class ="post-qr-code-img entered loaded" src ="/img/alipay.png" > </a > <div class ="post-qr-code-desc" > AliPay</div > </li > </ul > </div > </div > </div >
在需要增加的页面,md文件尾部增加以下css样式:
1 2 3 4 5 6 7 8 9 10 11 12 13 14 15 16 17 18 19 20 21 22 23 24 25 26 27 28 29 30 31 32 33 34 <style> .img-alt .is-center ::before {content : "" !important ;}#article-container ul > li :not (.tab )::before { top : unset !important ; width : unset !important ; height : unset !important ; border : unset !important ; border-radius : unset !important ; background : unset !important ; content : unset !important ; line-height : unset !important ; } .social-share { font-size : 0.85em !important ; } .reward-item { padding : 1rem .5rem 0 .5rem !important ; } .post-reward .reward-main .reward-all { display : inline-block; margin : 0 ; padding : 0 .5rem 1rem .5rem !important ; } .post-reward .post-qr-code-desc { margin-bottom : 0 !important ; } .post-qr-code-img .entered .loaded { display : unset !important ; margin : unset !important ; } .wechat-qrcode .help p { margin : unset !important ; } </style>
文章下增加点赞评分功能 效果预览 方法一:修改源代码一绝后患 第一步:注册账号 第二步:创建rating.js 第三步:配置rating 第四步:添加rating 附赠:各页面独立配置rating
前往下方链接,注册一个账号。完成后,再次访问下方链接,直接在页面左上角获得id留存备用。 在butterfly\themes\butterfly\layout\includes\post\目录下,创建rating.pug文件:
1 2 3 4 5 6 7 8 9 10 11 12 13 #wpac-rating script. wpac_init = window .wpac_init || []; wpac_init.push ({widget : 'Rating' , id : #{theme.rating .id }}); (function ( if ('WIDGETPACK_LOADED' in window ) return ; WIDGETPACK_LOADED = true ; var mc = document .createElement ('script' ); mc.type = 'text/javascript' ; mc.async = true ; mc.src = '//embed.widgetpack.com/widget.js' ; var s = document .getElementsByTagName ('script' )[0 ]; s.parentNode .insertBefore (mc, s.nextSibling ); })();
在butterfly\_config.butterfly.yml配置文件中,增加rating配置内容如下,其中id为1中的id:
1 2 3 rating: enable: true id: xxx
post文章页面
在butterfly\themes\butterfly\layout\post.pug文件中,增加以下内容,注意缩进:
1 2 3 4 5 6 7 8 9 10 11 12 13 14 15 16 17 18 19 20 21 extends includes/layout.pug block content #post if top_img === false include includes/header/post-info.pug article#article-container.post-content!=page.content include includes/post/post-copyright.pug .tag_share if (theme.post_meta.post.tags) .post-meta__tag-list each item, index in page.tags.data a(href=url_for(item.path)).post-meta__tags #[=item.name] include includes/third-party/share/index.pug if theme.reward.enable !=partial('includes/post/reward', {}, {cache: true}) + if theme.rating.enable + include ./includes/post/rating.pug
友链页面
在butterfly\themes\butterfly\layout\includes\page\flink.pug文件中,增加以下内容,注意缩进:
1 2 3 4 5 6 7 8 9 10 11 12 13 14 15 16 17 18 19 20 21 22 23 24 25 26 27 #article-container if top_img === false h1.page-title= page.title .flink if site.data.link each i in site.data.link if i.class_name h2!= i.class_name if i.class_desc .flink-desc!=i.class_desc .flink-list each item in i.link_list .flink-list-item a(href=url_for(item.link) title=item.name target="_blank") .flink-item-icon img(src=url_for(item.avatar) onerror=`this.onerror=null;this.src='` + url_for(theme.error_img.flink) + `'` alt=item.name ) .flink-item-name= item.name .flink-item-desc(title=item.descr)= item.descr != page.content .tag_share if theme.addThis.enable || theme.sharejs.enable || theme.addtoany.enable && page.share !== false include ./../third-party/share/index.pug if theme.reward.enable && page.reward !== false !=partial('includes/post/reward', {}, {cache: true}) + if theme.rating.enable && page.rating !== false + include ./../post/rating.pug
自己创建的独立页面
在butterfly\themes\butterfly\layout\includes\page\default-page.pug文件中,增加以下内容,注意缩进:
1 2 3 4 5 6 7 8 9 10 11 #article-container if top_img === false h1.page-title= page.title != page.content .tag_share if theme.addThis.enable || theme.sharejs.enable || theme.addtoany.enable && page.share !== false include ./../third-party/share/index.pug if theme.reward.enable && page.reward !== false !=partial('includes/post/reward', {}, {cache: true}) + if theme.rating.enable && page.rating !== false + include ./../post/rating.pug
可在文章头部信息中,增加rating: false来禁用当前页面的点赞按钮
方法二:不修改源代码较繁琐 第一步:注册账号 第二步:文章页尾部插入
前往下方链接,注册一个账号。完成后,再次访问下方链接,直接在页面获得id留存备用。 在需要点赞功能的页面md文件结尾加入以下内容:
1 2 3 4 5 6 7 8 9 10 11 12 13 14 15 <div id ="wpac-rating" > </div > <script type ="text/javascript" > wpac_init = window .wpac_init || []; wpac_init.push ({widget : 'Rating' , id : xxx}); (function ( if ('WIDGETPACK_LOADED' in window ) return ; WIDGETPACK_LOADED = true ; var mc = document .createElement ('script' ); mc.type = 'text/javascript' ; mc.async = true ; mc.src = 'https://embed.widgetpack.com/widget.js' ; var s = document .getElementsByTagName ('script' )[0 ]; s.parentNode .insertBefore (mc, s.nextSibling ); })(); </script >
图片下的说明文字居中 在blog/source/css/custom.css中添加如下代码:
1 2 3 .jg-caption { text-align : center !important ; }
给每个图片下增加个小图标 效果预览 注意这张图下的“⊙”图标。
代码实现流程 在blog/source/css/custom.css中添加如下代码:
1 2 3 4 5 6 7 8 9 .jg-caption-visible ::before { content : "⊙ " ; } .fancybox-caption__body ::before { content : "⊙ " ; } .img-alt .is-center ::before { content : "⊙ " ; }
首页文章列表效果 今天又折腾了下首页文章效果。主要是三点,增加鼠标hover动画,调整标题的字重,调整列表高度。
效果预览 特性
支持鼠标hover时,文章摘要淡入淡出 调整首页文章列表高度 调整首页文章标题字体字重 给文章摘要末尾动态添加emoji 😄😄 代码实现流程 Step1:修改首页UI布局 Step2:修改首页css样式 Step3:调整字体大小、字重 Step4:魔改后的完整homepage.styl内容 Step5:关闭首页文章分类,效果更佳
修改源代码警告
首先,修改首页UI样式,打开/themes/butterfly/layout/includes/mixins/post-ui.pug,修改为如下内容,butterfly 3.8.2版本可直接复制我的:
修改说明 注意缩进 .article-meta-wrap整个内容到a.article-title同级邻近位置,方便给article-title和content增加一个.recent-post-info-top父类。
1 2 3 4 5 6 7 8 9 10 11 12 13 14 15 16 17 18 19 20 21 22 23 24 25 26 27 28 29 30 31 32 33 34 35 36 37 38 39 40 41 42 43 44 45 46 47 48 49 50 51 52 53 54 55 56 57 58 59 60 61 62 63 64 65 66 67 68 69 70 71 72 73 74 75 76 77 78 79 80 81 82 83 84 85 86 87 88 89 90 91 92 93 94 95 96 97 98 99 100 101 102 103 104 105 106 107 108 109 110 111 mixin postUI(posts) each article , index in page.posts.data .recent-post-item - let link = article.link || article.path - let title = article.title || _p('no_title') - let leftOrRight = index%2 == 0 ? 'left_radius' : 'right_radius' - let post_cover = article.cover - let no_cover = article.cover === false || !theme.cover.index_enable ? 'no-cover' : '' if post_cover && theme.cover.index_enable .post_cover(class=leftOrRight) a(href=url_for(link) title=title) img.post_bg(src=url_for(post_cover) onerror=`this.onerror=null;this.src='`+ url_for(theme.error_img.post_page) + `'` alt=title) .recent-post-info(class=no_cover) .recent-post-info-top a.article-title(href=url_for(link) title=title)= title //- Display the article introduction on homepage case theme.index_post_content.method when false - break when 1 .content!= article.description when 2 if article.description .content!= article.description else - const content = strip_html(article.content) - let expert = content.substring(0, theme.index_post_content.length) - content.length > theme.index_post_content.length ? expert += ' ...' : '' .content!= expert default - const content = strip_html(article.content) - let expert = content.substring(0, theme.index_post_content.length) - content.length > theme.index_post_content.length ? expert += ' ...' : '' .content!= expert .article-meta-wrap if (is_home() && (article.top || article.sticky > 0)) span.article-meta i.fas.fa-thumbtack.sticky span.sticky= _p('sticky') span.article-meta__separator | if (theme.post_meta.page.date_type) span.post-meta-date if (theme.post_meta.page.date_type === 'both') i.far.fa-calendar-alt span.article-meta-label=_p('post.created') time.post-meta-date-created(datetime=date_xml(article.date) title=_p('post.created') + ' ' + full_date(article.date))=date(article.date, config.date_format) span.article-meta__separator | i.fas.fa-history span.article-meta-label=_p('post.updated') time.post-meta-date-updated(datetime=date_xml(article.updated) title=_p('post.updated') + ' ' + full_date(article.updated))=date(article.updated, config.date_format) else - let data_type_updated = theme.post_meta.page.date_type === 'updated' - let date_type = data_type_updated ? 'updated' : 'date' - let date_icon = data_type_updated ? 'fas fa-history' :'far fa-calendar-alt' - let date_title = data_type_updated ? _p('post.updated') : _p('post.created') i(class=date_icon) span.article-meta-label=date_title time(datetime=date_xml(article[date_type]) title=date_title + ' ' + full_date(article[date_type]))=date(article[date_type], config.date_format) if (theme.post_meta.page.categories && article.categories.data.length > 0) span.article-meta span.article-meta__separator | i.fas.fa-inbox each item, index in article.categories.data a(href=url_for(item.path)).article-meta__categories #[=item.name] if (index < article.categories.data.length - 1) i.fas.fa-angle-right if (theme.post_meta.page.tags && article.tags.data.length > 0) span.article-meta.tags span.article-meta__separator | i.fas.fa-tag each item, index in article.tags.data a(href=url_for(item.path)).article-meta__tags #[=item.name] if (index < article.tags.data.length - 1) span.article-meta__link #[='•'] mixin countBlockInIndex - needLoadCountJs = true span.article-meta span.article-meta__separator | i.fas.fa-comments if block block span.article-meta-label= ' ' + _p('card_post_count') if theme.comments.card_post_count case theme.comments.use[0] when 'Disqus' when 'Disqusjs' +countBlockInIndex a(href=full_url_for(link) + '#disqus_thread') when 'Valine' +countBlockInIndex a(href=url_for(link) + '#post-comment' itemprop="discussionUrl") span.valine-comment-count(data-xid=url_for(link) itemprop="commentCount") when 'Waline' +countBlockInIndex a(href=url_for(link) + '#post-comment') span.waline-comment-count(id=url_for(link)) when 'Twikoo' +countBlockInIndex a.twikoo-count(href=url_for(link) + '#post-comment') when 'Facebook Comments' +countBlockInIndex a(href=url_for(link) + '#post-comment') span.fb-comments-count(data-href=urlNoIndex(article.permalink)) if theme.ad && theme.ad.index if (index + 1) % 3 == 0 .recent-post-item.ads-wrap!=theme.ad.index
修改首页布局样式,增加hover时动画等效果。为了移动端浏览体验,仅添加给PC端。打开butterfly/themes/butterfly/source/css/_page/homepage.styl文件,结尾处增加如下内容(顶格写,与#recent-posts同级 ):
1 2 3 4 5 6 7 8 9 10 11 12 13 14 15 16 17 18 19 20 21 22 23 24 +minWidth768() #recent-posts .recent-post-item height: 15em & > .recent-post-info > .recent-post-info-top > .content visibility: hidden transition: .1s linear line-height: 1.4 opacity: 0 &::after content: "" &:hover .recent-post-info > .recent-post-info-top > .content visibility: visible transition: .2s linear line-height: 1.4 margin-top: 5px margin-bottom: 20px opacity: 1 &::after content: " 😄😄" &:hover .recent-post-info > .article-meta-wrap transition: .2s linear margin-top: 5px color: rgba(133,133,133,0.70)
我还微调了字体大小。在homepage.styl文件中,顶部 & > .recent-post-item原内容下,增加以下内容:
1 2 3 4 5 6 7 8 9 10 11 12 & > .recent-post-item display: flex flex-direction: row align-items: center height: 20em border-radius: 12px 8px 8px 12px background: var(--card-bg) box-shadow: var(--card-box-shadow) transition: all .3s + & > .recent-post-info > .recent-post-info-top > .article-title + font-size: 1.43em + font-weight: bold
不想一点点研究,就一键复制粘贴 至少 butterfly v3.7.8~3.8.2 都可以直接用。
1 2 3 4 5 6 7 8 9 10 11 12 13 14 15 16 17 18 19 20 21 22 23 24 25 26 27 28 29 30 31 32 33 34 35 36 37 38 39 40 41 42 43 44 45 46 47 48 49 50 51 52 53 54 55 56 57 58 59 60 61 62 63 64 65 66 67 68 69 70 71 72 73 74 75 76 77 78 79 80 81 82 83 84 85 86 87 88 89 90 91 92 93 94 95 96 97 98 99 100 101 102 103 104 105 106 107 108 109 110 111 112 113 114 115 116 117 118 119 120 121 122 123 124 125 126 127 128 129 130 131 132 133 134 135 136 137 138 139 140 141 142 143 144 145 146 147 148 149 150 151 152 153 154 155 156 157 158 159 160 161 162 163 164 165 166 167 168 169 170 171 172 173 174 175 176 177 178 179 180 181 182 183 184 185 #recent-posts & > .recent-post-item:not(:first-child) margin-top: 1rem & > .recent-post-item display: flex flex-direction: row align-items: center height: 20em border-radius: 12px 8px 8px 12px background: var(--card-bg) box-shadow: var(--card-box-shadow) transition: all .2s & > .recent-post-info > .recent-post-info-top > .article-title font-size: 1.43em font-weight: bold +maxWidth768() border-radius: 12px 12px 8px 8px &:hover box-shadow: var(--card-hover-box-shadow) img.post_bg transform: scale(1.1) if hexo-config('cover.position') == 'both' .left_radius border-radius: 8px 0 0 8px .right_radius order: 2 border-radius: 0 8px 8px 0 else if hexo-config('cover.position') == 'left' .left_radius border-radius: 8px 0 0 8px .right_radius border-radius: 8px 0 0 8px else if hexo-config('cover.position') == 'right' .left_radius order: 2 border-radius: 0 8px 8px 0 .right_radius order: 2 border-radius: 0 8px 8px 0 &.ads-wrap display: block !important height: auto !important .post_cover overflow: hidden width: 45% height: 100% -webkit-mask-image: -webkit-radial-gradient(white, black) img.post_bg width: 100% height: 100% transition: all .3s object-fit: cover &:hover transform: scale(1.1) & >.recent-post-info display: inline-block overflow: hidden padding: 0 40px width: 55% &.no-cover width: 100% & > .recent-post-info-top > .article-title @extend .limit-more-line margin-bottom: .3rem color: var(--text-highlight-color) font-size: 1.43em line-height: 1.4 transition: all .2s ease-in-out -webkit-line-clamp: 2 font-weight: bold &:hover color: $text-hover & > .article-meta-wrap color: $theme-meta-color font-size: 90% & > .post-meta-date cursor: default .sticky color: $sticky-color i margin: 0 .2rem 0 0 .article-meta-label if hexo-config('post_meta.page.label') padding-right: .2rem else display: none .article-meta__separator margin: 0 .3rem .article-meta__link margin: 0 .2rem .fa-angle-right margin: 0 .2rem if hexo-config('post_meta.page.date_format') == 'relative' time display: none a color: $theme-meta-color &:hover color: $text-hover text-decoration: underline & > .recent-post-info-top > .content @extend .limit-more-line line-height: 1.4 margin-top: .3rem -webkit-line-clamp: 3 +maxWidth768() #recent-posts .recent-post-item flex-direction: column height: auto !important .post_cover order: 1 !important width: 100% height: 230px border-radius: 8px 8px 0 0 .recent-post-info order: 2 !important padding: 1rem 1rem 1.5rem width: 100% &.no-cover padding: 1.5rem 1rem &.recent-post-info-top > .article-title font-size: 1.43em &.recent-post-info-top > .content height: auto +minWidth768() #recent-posts .recent-post-item height: 15em & > .recent-post-info > .recent-post-info-top > .content visibility: hidden transition: .1s linear line-height: 1.4 opacity: 0 &::after content: "" &:hover .recent-post-info > .recent-post-info-top > .content visibility: visible transition: .2s linear line-height: 1.4 margin-top: 5px margin-bottom: 20px opacity: 1 &::after content: " 😄😄" &:hover .recent-post-info > .article-meta-wrap transition: .2s linear margin-top: 5px color: rgba(133,133,133,0.70)
搭配这个效果,建议主题配置文件中,关闭首页的文章分类显示,效果更佳。
1 2 3 4 5 6 7 post_meta: page: date_type: created date_format: relative categories: false tags: true label: true
bber说说首页轮播 一开始使用小康的轮播样式,通过butterfly侧边栏控件实现,也导致非首页时,侧边栏内容为空,且占用地方,css隐藏也不太好。昨天参考木木的代码,改了下。
首先按照木木教程,配置好云函数,获取到json链接,浏览器访问可以正常看到说说数据。
代码实现流程 第一步:创建js、css 第二步:添加css 第三步:首页布局中引入 jQuery与timeago下载
依赖jQuery
添加以下js代码,自己新建或加到已有的js文件中,其中跳转URL和json URL换成你自己的。(自己新建的,记得blog/_config.butterfly.yml中inject里引入)
1 2 3 4 5 6 7 8 9 10 11 12 13 14 15 16 17 18 19 20 21 22 23 24 25 26 27 28 29 30 31 32 33 34 35 36 37 38 39 40 41 42 43 44 45 46 47 48 49 var pathName = window .document .location .pathname if (pathName === '/' ) { $(document ).ready (function ( if ( $("#bber-talk" ).length > 0 ) { var jsonUrl = '' jsonUrl = "https://626c-blogpkly-13278c-1258453354.tcb.qcloud.la/json/bber.json" $.getJSON (jsonUrl+"?t=" +Date .parse ( new Date ()),function (res ){ var bberHtml = '' $.each (res.data , function (i, item ){ var d = new Date (item.date ) var date = d.getFullYear ()+'/' +(d.getMonth ()+1 )+'/' +d.getDate () +' ' +d.getHours ()+':' +d.getMinutes ()+':' +d.getSeconds () var dataTime = timeago.format (date, 'zh_CN' ); var newdataTime = '<span class="datatime">' +dataTime+'</span>' bberHtml += '<li class="item item-' +(i+1 )+'">' +'<a href="https://guole.fun/bb/" style="color: var(--font-color);/*font-weight: normal;*/">' +newdataTime+': ' +urlToLink (item.content )+'</a></li>' }); $('#bber-talk' ).append ('<span class="index-talk-icon" style="margin-right: 5px"><svg viewBox="0 0 550 550" width="15" height="15"><path d="M448 0H64C28.7 0 0 28.7 0 64v288c0 35.3 28.7 64 64 64h96v84c0 7.1 5.8 12 12 12 2.4 0 4.9-.7 7.1-2.4L304 416h144c35.3 0 64-28.7 64-64V64c0-35.3-28.7-64-64-64zm16 352c0 8.8-7.2 16-16 16H288l-12.8 9.6L208 428v-60H64c-8.8 0-16-7.2-16-16V64c0-8.8 7.2-16 16-16h384c8.8 0 16 7.2 16 16v288z"></path></svg></span><ul class="talk-list">' +bberHtml+'</ul>' ) }); function urlToLink (str ) { var img_tag = /(<br>)|([[\s\S]*])|(\()|(\))/g ; var re_forimg =/\<[img|IMG].*?src=[\'|\"](https\:\/\/.*?(?:[\.jpg|\.jpeg|\.png|\.gif|\.bmp]))[\'|\"].*?[\/]?>/g ; var music = /(y.qq.com)|(music.163.com)/g ; var music_url = /[a-zA-z]+:\/\/[^\s]*/g ; if (music.test (str)) { str =str.replace (music_url,function ( return '<svg viewBox="0 0 1024 1024" width="18" height="18"><path d="M960 0H1024v736c0 88.3712-100.283733 160-224 160S576 824.3712 576 736s100.283733-160 224-160c62.685867 0 119.3472 18.397867 160 48.042667V256l-512 113.783467v494.216533c0 88.3712-100.283733 160-224 160S0 952.3712 0 864s100.283733-160 224-160c62.685867 0 119.3472 18.397867 160 48.042667V128L960 0z"></path></svg>音乐分享' ; }); } else {} str =str.replace (re_forimg,'$1' ); var re_formd = /^!\[(.*)\]\((.*)\)/g ; str = str.replace (re_formd,'$2' ); str = str.replace (img_tag,"" ); var re =/\bhttps?:\/\/(?!\S+(?:jpe?g|png|bmp|gif|webp|gif))\S+/g ; var re_forpic =/\bhttps?:\/\/.*?(\.gif|\.jpe?g|\.png|\.bmp|\.webp)/g ; str =str.replace (re,function (website ) { return '<svg viewBox="0 0 1025 1024" width="21" height="21"><path d="M333.06186 733.061768c-58.347896 52.210106-97.040127 49.051159-136.467091 9.492188l-45.156456-48.462758c-39.427988-39.541575-39.427988-103.667058 0-143.226029l193.260585-193.848986c39.426965-39.558971 103.355973-39.558971 142.78396 0l35.679617 35.794228c30.457686 30.555923 37.398772 75.762521 20.801768 112.997564l86.286202 66.040089c59.149145-59.33027 59.149145-155.517983 0-214.830857L523.162476 249.600755c-59.133795-59.33027-155.010423-59.33027-214.160591 0L44.350342 515.071965c-59.133795 59.313897-59.133795 155.50161 0 214.830857l107.08797 107.415428c59.133795 59.313897 155.026796 59.313897 214.176964 0l102.161774-105.647155-72.980151-70.034053L333.06186 733.061768zM987.196021 285.394982 880.1234 177.979554c-59.149145-59.33027-155.026796-59.33027-214.176964 0 0 0 4.223185-1.064238-57.988716 61.343113l71.113641 68.167542 31.604812-34.877345c39.427988-39.541575 103.356996-39.541575 142.78396 0l35.69599 35.8106c39.427988 39.541575 39.427988 103.667058 0 143.226029L714.818517 632.847345c-39.427988 39.541575-103.340623 39.541575-142.768611 0l-29.395494-48.462758c-61.883419-46.25344-42.865273-57.317427-37.611619-88.544639L426.548044 418.130076c-59.150168 59.33027-59.150168 155.517983 0 214.830857l107.072621 107.432825c59.149145 59.312874 155.026796 59.312874 214.176964 0l239.398392-240.166895C1071.582967 402.924769 987.196021 285.394982 987.196021 285.394982z"></path></svg>' ; }); str =str.replace (re_forpic,function (imgurl ) { return '<svg viewBox="0 0 1024 1024" width="21" height="21"><path d="M821.6 120.93333333H195.4c-74.1 0-134.2 60.1-134.2 134.2v492c0 74.1 60.1 134.2 134.2 134.2h626.2c74.1 0 134.2-60.1 134.2-134.2v-492c0-74.1-60.1-134.2-134.2-134.2zM251.3 255.13333333c30.9 0 55.9 25 55.9 55.9s-25 55.9-55.9 55.9-55.9-25-55.9-55.9 25-55.9 55.9-55.9z m614.6 559.1H153.3c-37.3 0-58.2-43.1-35.1-72.4L302.1 508.33333333c17.9-22.7 52.4-22.7 70.3 0l76.5 97.2 148.6-260c17.2-30.1 60.5-30.1 77.7 0L904.8 747.33333333c17 29.8-4.5 66.9-38.9 66.9z"></path></svg>' ; }); return str; } function Roll ( var list_li = $('.talk-list li' ),cur_li = list_li.first (),last_li = list_li.last (); last_li.after (cur_li); }; setInterval (Roll ,3000 ); } }); } else {}
可以新建或添加以下代码到已有的自定义css文件中。(自己新建的,记得blog/_config.butterfly.yml中inject里引入)
1 2 3 4 5 6 7 8 #bber-talk {background :var (--card-bg);color :var (--fontcolor);padding :0.6rem 1rem 0.5rem 1rem ;border-radius :12px ;cursor :auto;box-shadow :var (--card-box-shadow);display :-webkit-flex;display :flex;-webkit-align-items :center;align-items :center;overflow :hidden;transition :all 0.3s ;margin-bottom :-0.2rem ;z-index : 10 ;position : relative;}#bber-talk :not (a ){font-weight :bold;}#bber-talk svg {fill : currentColor;vertical-align : middle;display : inline;margin-right :5px ;}#bber-talk .talk-list {margin : 0 ;padding : 0 ;max-height : 1.6rem ;overflow : hidden;margin-bottom : -0.3rem ;transition : all 1s ease-in-out;}#bber-talk .talk-list :hover {color : #49b1f5 !important ;transition : all .15s ease-in-out;}#bber-talk .talk-list li .item a {cursor :pointer;}#bber-talk .talk-list li {list-style : none;width : 100% ;white-space : nowrap;text-overflow : ellipsis;overflow : hidden;}
找到/themes/butterfly/layout/index.pug文件,在#recent-posts.recent-posts这一行下,添加以下内容,注意缩进:
1 2 3 4 #recent-posts.recent-posts #bber-talk script(src='/js/jquery.min.js') script(src='/js/timeago.min.js')
bber说说美化 效果预览 按照木木教程配置正常使用后,可按照以下方法美化前端展示。方法来自小康博客,个人调整了一些东西:
调整了说说出现图片时,顶部空白过大问题 调整了“再翻翻”,增加阴影和hover效果 调整顶部“My BiBi”为“闪念” 更换一种timeago方法,解决“两周前”、“三周前”等部分情况下显示实际日期的bug 修复头像尺寸异常的bug 其他若干小调整 食用方法 新建说说页面 timeago.min.js下载 鸣谢
新建一个bb(说说)独立页面,然后直接复制粘贴以下内容:
1 2 3 4 5 6 7 8 9 10 11 12 13 14 15 16 17 18 19 20 21 22 23 24 <!-- 自言自语 --> <div id ='speak' > <link rel ="stylesheet" href ="https://cdn.jsdelivr.net/npm/aplayer/dist/APlayer.min.css" > <script type ="text/javascript" src ="/js/timeago.min.js" charset ="utf-8" > </script > <script type ="text/javascript" src ="https://cdn.jsdelivr.net/gh/kuole-o/bber-ispeak@main/dist/ispeak-bber.min.js" charset ="utf-8" > </script > <script > ispeakBber .init ({ el : '#speak' , name : '夜的第八章 🦄' , envId : 'blogpkly-13278c' , region : 'ap-shanghai' , limit : 7 , avatar : 'https://cdn.guole.fun/img/gl.jpg' , fromColor :'rgb(245, 150, 170)' , loadingImg : 'https://7.dusays.com/2021/03/04/d2d5e983e2961.gif' , dbName :'talks' }) .then (function ( console .log ('哔哔 加载完成' ) }) </script > </div >
木木bber正确食用方法 木木的 bber 食用踩坑记录 + 皮肤更换 + Android 捷径 + Chrome + Edge 多种方式直发说说,随时记录你的闪念!
首页文章轮播模块 使用了hexo-butterfly-swiper插件,可本站首页预览效果。
食用方法 第一步:安装插件 第二步:配置插件 第三步:使用插件 鸣谢
在blog项目根目录,执行命令安装:
1 npm install hexo-butterfly-swiper --save
在站点配置文件_config.yml 或者主题配置文件_config.butterfly.yml 中添加:
1 2 3 4 5 6 7 8 9 10 11 12 13 14 swiper: enable : true priority: 5 enable_page: all timemode: date layout: type : id name: recent-posts index: 0 default_descr: 再怎么看我也不知道怎么描述它的啦! custom_css: https://cdnjs.cloudflare.com/ajax/libs/Swiper/4.1.6/css/swiper.min.css custom_js: https://cdnjs.cloudflare.com/ajax/libs/Swiper/4.1.6/js/swiper.min.js
在需要置顶轮播的文章.md文件头部中,添加以下内容即可使用:
1 swiper_index: 1 #置顶轮播图顺序,非负整数,数字越大越靠前
首页文章分类磁贴 移动端可用css隐藏。
食用方法 修改源代码警告 鸣谢
修改\themes\butterfly\layout\index.pug1 2 3 4 5 6 7 8 9 10 extends includes/layout.pug block content include ./includes/mixins/post-ui.pug #recent-posts.recent-posts + if theme.categoryBar.enable + .recent-post-item(style='height:auto;width:100%;padding:0px;') + #categoryBar!= list_categories(site.categories,{class: 'categoryBar',depth: 1}) +postUI include includes/pagination.pug
新建\themes\butterfly\source\css\_layout\categoryBar.styl1 2 3 4 5 6 7 8 9 10 11 12 13 14 15 16 17 18 19 20 21 22 23 24 25 26 27 28 29 30 31 32 33 34 35 36 37 38 39 40 41 42 43 44 45 46 47 48 49 50 51 52 53 54 55 56 57 58 59 60 61 62 63 64 65 66 67 68 69 70 71 72 73 74 75 76 77 78 79 80 81 82 83 84 85 86 87 88 89 90 91 92 93 94 95 96 97 98 99 100 if hexo-config('categoryBar.enable ') #categoryBar width 100% !important ul &.categoryBar-list margin 5px 5px 0 5px !important padding 0 !important li &.categoryBar-list-item font-weight bold display inline-block height 180px !important margin 5px .5% 0 .5% !important background-image linear-gradient(rgba(0 , 0 , 0 , 0.4 ) 25% , rgba(16 , 16 , 16 , 0 ) 100% ) border-radius 10px padding 25px 0 25px 25px !important box-shadow rgba(50 , 50 , 50 , 0.3 ) 50px 50px 50px 50px inset overflow hidden background-size 100% !important background-position center!important &:hover background-size 110% !important box-shadow inset 500px 50px 50px 50px rgba(50 ,50 ,50 , 0.6 ) span &.categoryBar-list-count &::after transition all .5s transform translate (-100% , 0 ) a &.categoryBar-list-link color white!important font-size 20px !important &::before content '|'!important color white!important font-size 20px !important &:after content '' position relative width 0 bottom 0 display block height 3px border-radius 3px background-color white &:hover &:after width 90% left 1% transition all 0.5s span &.categoryBar-list-count display block!important color white!important font-size 20px !important &::before content '\f02d'!important padding-right 15px !important @extend .fontawesomeIcon &::after padding 5px display block!important color white!important font-size 20px !important position relative right -100% covers = hexo-config('categoryBar.cover' ) for cover,i in covers li.categoryBar-list-item :nth-child({i +1 }) background unquote(cover) descrs = hexo-config('categoryBar.descr ') for descr,i in descrs li .categoryBar-list-item :nth-child ({i +1 })>span ::after content descr!important if hexo-config('categoryBar.column ') == 'odd' li &.categoryBar-list-item width 32.3% !important else if hexo-config('categoryBar.column ') == 'even' li &.categoryBar-list-item width 24% !important @media screen and (max-width : 650px ) li &.categoryBar-list-item width 48% !important height 150px !important margin 5px 1% 0 1% !important $caterow = hexo-config('categoryBar.row' )?hexo-config('categoryBar.row' ):2 .categoryBar-list max-height 190px * $caterow overflow auto &::-webkit-scrollbar width 0 !important @media screen and (max-width : 650px ) .categoryBar-list max-height 160px * $caterow
在 _config.butterfly.yml 添加配置项1 2 3 4 5 6 7 8 9 10 11 12 13 14 15 16 17 18 categoryBar: enable: true column: odd row: 1 descr: - 长篇小说连载 - 杂谈教程 - 玩转Win10 - Ubuntu指南 - 个人日记 - 诗词歌赋 cover: - url('https://cdn.jsdelivr.net/npm/akilar-candyassets/image/cover1.webp') - '#abcdef' - rgba(45,67,89,0.7) - linear-gradient(rgba(0, 0 , 0 , 0.4 ) 25 %, rgba(200,16 , 16 , 0 ) 100 %) - url('https://cdn.jsdelivr.net/npm/akilar-candyassets/image/cover5.webp') - url('https://cdn.jsdelivr.net/npm/akilar-candyassets/image/cover6.webp')
侧边栏天气时钟 效果可查看本站侧边栏效果,移动端往下滑。
食用方法 第一步:安装插件 第二步:配置插件 第三步(可选):去除时钟背景 鸣谢
blog项目根目录执行以下命令:
1 npm install hexo-butterfly-clock --save
1 2 3 4 5 6 7 8 9 10 11 12 13 14 electric_clock: enable: true priority: 5 enable_page: all exclude: layout: type: class name: sticky_layout index: 0 loading: /img/loading.gif
在上述的自定义css里,增加以下内容调整样式:
1 2 3 4 #aside-content .aside-content > .sticky_layout > .card-widget .card-clock > .card-glass > .card-background { background-color : unset ; box-shadow : unset ; }
随机文章 在博客根目录/scripts(没有请自行创建)下新建random.js文件(无需页面引入,不能放在source/js/目录),打开/random/就会随机跳转一篇文章。 random.js内容如下:
代码实现流程 random.js 可选配置 鸣谢
1 2 3 4 5 6 7 8 9 10 11 hexo.extend .generator .register ('random' , function (locals ) { const config = hexo.config .random || {} const posts = [] for (const post of locals.posts .data ) { if (post.random !== false ) posts.push (post.path ) } return { path : config.path || 'random/index.html' , data : `<html><head><script>var posts=${JSON .stringify(posts)} ;window.open('/'+posts[Math.floor(Math.random() * posts.length)],"_self")</script></head></html>` } })
可以在_config.yml添加以下配置:
如果不想随机跳转到某篇文章,只需在这篇文章md文件头部,添加:
魔改源代码后如何更新 主题魔改修改源代码后,如何简单更新?我有两种方法:
查看详情 方法一:通过Github提交记录 方法二:巧用VS Code软件
适用于代码变更较少/版本号相差不多时
打开butterfly源代码仓库,切换到master正式版本分支 2. 找到你自己的版本与主题最新版本中间相差的那些提交 3. 点击每一个提交,查看修改的源代码记录,然后自己一处处修改(建议从旧往新,从自己当前版本的下一个版本开始改)
适用于大多数时候
下载master分支的realse产物 2. 解压缩后,删除文件夹中```butterfly/.git```目录 3. 在自己项目目录```git```三连,提交一次自己的版本,让```git```记录下你的文件变化 4. 重命名自己当前项目下的```butterfly```文件夹为```butterfly1``` 5. 将刚才下载处理后的```butterfly```整个文件夹移动到blog项目```themes```目录下 6. 查看文件列表,修改(与你刚才提交的自己魔改内容不同的文件,且未提交时),```vs code```会提示一个“M”图标,如下 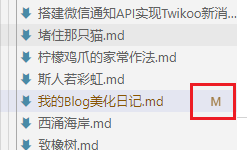 7. 使用```vs code```编辑器,点击```打开更改```,查看每一处变更项。  8. 点击“行号”前的灯泡,对于已删除(魔改添加内容)选择“恢复已删除内容”,而新增项若是之前删掉的再次删掉即可
胆大心细,定期更新,相差文件不多倒也不麻烦。 注意:自己新增的文件,需要自己重新copy回来。
主题插件 页面插入B站视频/Bilibili 起初,用了 hexo-tag-bilibili 等插件,结果压根不好用。PC端不能全屏展示,移动端又超出页面了,简直离谱……
干脆自己写html标签,在需要的文章页插入即可。
效果预览 食用方法 文章页插入html代码 修改css样式
直接复制插入你的md文章就行,修改里面的aid为你的视频id:
1 2 3 4 5 6 7 8 9 10 11 <div align =center class ="aspect-ratio" > <iframe src ="https://player.bilibili.com/player.html?aid=9926758&&page=1&as_wide=1&high_quality=1&danmaku=0&autoplay=0" scrolling ="no" border ="0" frameborder ="no" framespacing ="0" high_quality =1 danmaku =1 allowfullscreen ="true" > </iframe > </div >
记得去blog/source/css/custom.css里,添加上述的样式:
1 2 3 4 5 6 7 8 9 .aspect-ratio {position : relative;width : 100% ;height : 0 ;padding-bottom : 75% ;margin : 3% auto;text-align : center;} .aspect-ratio iframe { position : absolute; width : 100% ; height : 100% ; left : 0 ; top : 0 ; }
文章加密 效果预览 可以通过一个小插件,实现文章输入密码才能浏览。通过以下命令安装插件:
1 npm install hexo-blog-encrypt --save
接着在文章头部里,添加以下内容即可使用:
1 2 password: test message: 测试加密,这里的密码是:test
侧边栏添加两个旋转小人 效果预览 代码实现流程 第一步:修改源代码 第二步:修改主题配置 鸣谢
找到/themes/butterfly/layout/includes/widget/card_announcement.pug文件,添加最后一行代码:
1 2 3 4 5 6 7 if theme.aside.card_announcement.enable .card-widget.card-announcement .item-headline i.fas.fa-bullhorn.card-announcement-animation span= _p('aside.card_announcement') .announcement_content!= theme.aside.card_announcement.content .twopeople!= theme.aside.card_announcement.twopeople
在主题配置文件_config.butterfly.yml中,Ctrl + F 搜索定位到card_announcement,在content下,新增twopeople配置项:
注意缩进 以免后续本站调整防盗链策略,导致功能失效。
1 2 3 4 card_announcement: enable: true content: 保持理智,相信明天 twopeople: '<div class="twopeople"><div class="container"style="height:200px;"><canvas class="illo"width="800"height="800"style="max-width: 200px; max-height: 200px; touch-action: none; width: 640px; height: 640px;"></canvas></div><script src="https://cdn.guole.fun/js/twopeople1.js"></script><script src="https://cdn.guole.fun/js/zdog.dist.js"></script><script id="rendered-js"src="https://cdn.guole.fun/js/twopeople.js"></script><style>.twopeople{margin:0;align-items:center;justify-content:center;text-align:center}canvas{display:block;margin:0 auto;cursor:move}</style></div>'
Twikoo新评论微信消息提醒 使用企业微信插件,自行搭建Twikoo的消息提醒API,像收女朋友微信消息一样接收新评论提醒!
效果预览 Twikoo多个页面共用一套评论 在多个页面共用一套Twikoo评论,内容数据一致。 适用场景:“关于我”和“留言板”页面评论同步、Blog主站与分站评论同步 效果预览:以下两个页面评论数据是一致的 配置过程 在_config.butterfly.yml中,Ctrl + F 搜索定位到twikoo,在option下,新增一个参数path,内容修改如下:
1 2 3 4 5 6 twikoo: envId: blogpkly-13278c region: ap-shanghai visitor: false option: path: 'window.TWIKOO_MAGIC_PATH||window.location.pathname'
在需要同步的两个或多个页面md文件中,在正文部分添加如下内容:
1 <script>window .TWIKOO_MAGIC_PATH ="西涌" </script>
需要同步的多个页面中,添加的window.TWIKOO_MAGIC_PATH值必须一致 实测window.TWIKOO_MAGIC_PATH=要使用中文汉字,之前用英文好像有问题 pjax与twikoo 使用pjax功能后,twikoo不同页面评论可能未加载,需要每次手动刷新问题的解决方法。
设置twikoo的path后pjax重加载 设置过不同页面不同 twikoo path 后,pjax不能重加载评论,导致页面评论空白,一定要刷新一次后才能展示。在设置过 twikoo path 的md文件页面,修改为如下内容:
方法一:Butterfly提供 方法二:Butterfly提供 方法三:pjax官方提供 终极方法:每个页面重载twikoo
给原有内容,增加data-pjax属性。
1 <script data-pjax > window .TWIKOO_MAGIC_PATH ="留言板" </script >
给原有内容,包一层js-pjax的类。
1 2 3 <div class ="js-pjax" > <script > window .TWIKOO_MAGIC_PATH ="友链" </script > </div >
给原有内容,包一层pjax-reload的类。
1 2 3 <div class ="pjax-reload" > <script > window .TWIKOO_MAGIC_PATH ="友链" </script > </div >
使用这一步,无需设置上一步中的twikoo path 的 pjax 重加载。
修改主题pjax源码Blog/themes/butterfuly/layout/includes/third-party/pjax.pug,找到如下内容,增加一行.tk-comments-container,注意用单引号引起来。
1 2 3 4 5 6 7 8 9 10 11 script(src=url_for(theme.CDN.pjax)) script. let pjaxSelectors = [ 'title', '#config-diff', '#body-wrap', '#rightside-config-hide', '#rightside-config-show', '.js-pjax', '.tk-comments-container' ]
Twikoo自定义访客通知邮件模板 效果预览 略有不足
Hexo + Butterfly异地维护更新 面临问题:
Hexo不比Hugo,使用了大量npm插件,有个node_modules目录无法git push到Github等网站保存。 /themes/butterfly/下的主题文件夹,你会发现同样无法git push到Github。这是因为,butterfly是你克隆原作者的仓库,不能嵌套push解决方案 针对1,我们只用另一台电脑安装好hexo,然后git init创建版本库,接着git pull拉取之前的源代码,再项目根目录执行npm insatll安装所有package.json中的依赖即可。 确保还未修改主题源代码,将/themes/下的butterfly/文件夹移动到桌面,然后手动git add .,git commit -m "update",git push到Github一次。 然后在桌面,打开butterfly/目录,手动删除.git文件夹,再把butterfly/移动到/themes/下,接着push即可。此后,每次更新butterfly,都需要手动下载到本地,删除.git后,再移动到/themes/中。
注: 第1点中,如果首次在另一台电脑配置blog,要blog根目录 执行npm insatll安装所有依赖。
volantis标签外挂 volantis主题拥有大量优美好看的标签,可移植到butterfly上使用。再次感谢volantis主题全体开发人员。
文章插入地图 效果演示 混合地图 googleMap 高德地图 百度地图 geoqMap openstreetMap
[{"url":"https://cdn.guole.fun/img/202107/hunhe1.jpg","alt":"混合地图","title":""},{"url":"https://cdn.guole.fun/img/202107/hunhe2.jpg","alt":"混合地图","title":""},{"url":"https://cdn.guole.fun/img/202107/hunhe3.jpg","alt":"混合地图","title":""},{"url":"https://cdn.guole.fun/img/202107/hunhe4.jpg","alt":"混合地图","title":""},{"url":"https://cdn.guole.fun/img/202107/hunhe5.jpg","alt":"混合地图","title":""},{"url":"https://cdn.guole.fun/img/202107/hunhe6.jpg","alt":"混合地图","title":""},{"url":"https://cdn.guole.fun/img/202107/hunhe7.jpg","alt":"混合地图","title":""}]
[{"url":"https://cdn.guole.fun/img/202107/google1.jpg","alt":"谷歌地图","title":""},{"url":"https://cdn.guole.fun/img/202107/google2.jpg","alt":"谷歌地图","title":""},{"url":"https://cdn.guole.fun/img/202107/google3.jpg","alt":"谷歌地图","title":""}]
[{"url":"https://cdn.guole.fun/img/202107/gaode1.jpg","alt":"高德地图","title":""},{"url":"https://cdn.guole.fun/img/202107/gaode2.jpg","alt":"高德地图","title":""},{"url":"https://cdn.guole.fun/img/202107/gaode3.jpg","alt":"高德地图","title":""}]
[{"url":"https://cdn.guole.fun/img/202107/baidu1.jpg","alt":"百度地图","title":""},{"url":"https://cdn.guole.fun/img/202107/baidu2.jpg","alt":"百度地图","title":""},{"url":"https://cdn.guole.fun/img/202107/baidu3.jpg","alt":"百度地图","title":""}]
[{"url":"https://cdn.guole.fun/img/202107/geoq1.jpg","alt":"Geoq地图","title":""},{"url":"https://cdn.guole.fun/img/202107/geoq2.jpg","alt":"Geoq地图","title":""},{"url":"https://cdn.guole.fun/img/202107/geoq3.jpg","alt":"Geoq地图","title":""},{"url":"https://cdn.guole.fun/img/202107/geoq4.jpg","alt":"Geoq地图","title":""},{"url":"https://cdn.guole.fun/img/202107/geoq5.jpg","alt":"Geoq地图","title":""}]
支持GoogleMap、高德地图、百度地图、Geoq地图、openstreetMap常规地图+卫星地图+卫星标注地图!点击查看站内教程:
添加标签/分类/归档统计图表,雷达图 效果演示 文章发布日历效果 文章发布统计效果 标签统计效果 分类统计效果 分类雷达图效果
点击查看站内教程:
文章插入网络音乐 择期更新
文章插入本地音乐 择期更新
开启全局吸底音乐及样式微调 择期更新
踩坑经历及Bug解决 访问循环依赖项中不存在的属性xxx 解决方法 如果你也遇到以下报错:
1 2 3 4 5 6 7 (node:17148) Warning: Accessing non-existent property 'lineno' of module exports inside circular dependency (Use `node --trace-warnings ...` to show where the warning was created) (node:17148) Warning: Accessing non-existent property 'column' of module exports inside circular dependency (node:17148) Warning: Accessing non-existent property 'filename' of module exports inside circular dependency (node:17148) Warning: Accessing non-existent property 'lineno' of module exports inside circular dependency (node:17148) Warning: Accessing non-existent property 'column' of module exports inside circular dependency (node:17148) Warning: Accessing non-existent property 'filename' of module exports inside circular dependency
解决方法 原因,是hexo使用的一个插件lib年久失修,其中引用了stylus这个插件,依赖版本是stylus: 0.54.5,这个版本在node v14上,有兼容性问题。
而lib这个项目,上一次更新还是好几年前……
其实很好解决,手动更新lib里的依赖stylus到最新"stylus": "0.54.6"即可。
解决方法:
进入lib插件目录。在你的blog项目根目录下,执行: 接着,执行: 等待更新完成,回到blog根目录,本地预览看看有没有报错信息: 恭喜!问题已解决~~
页面布局错乱 假如没有修改主题布局,或修改内容不涉及这些,但文章页出现错乱。比如,侧边栏出现在文章内容下方,而不是右侧。
这种时候,认真检查md文章内容,看看是否插入的html标签忘了闭合,导致渲染出错。(……要不是昨晚排查到 04点,我会知道这个?都怀疑人生了……)
某个页面Twikoo加载失败 神奇……最后排查发现,是使用了外挂标签Tabs,写成下面这样导致的:
1 2 3 4 5 6 7 8 9 {% tabs Twikoo %} <!-- tab 第一个Tab --> 啦啦啦 <!-- endtab --> <!-- tab 第二个Tab --> 啦啦啦 <!-- endtab --> {% endtabs %}
解决方法是,`